

An ax was bought to add to the handle.
This is now my splitting ax.


At the Sedgefield Market, I saw a guy that was doing some forging. He had some awesome looking tomahawks, ranging from R2500 to R4500. I had a talk with him and he told me that he forge the tomahawks from ball hammers. When I got home, I couldn't wait to start forging.
Got myself a ball hammer for R93, borrowed an anvil from the workshop, made a "forge" from a sand filter and Bob's your uncle . . . . . or so I thought.


It was waaaayyyyyyyy harder than it looked on TV !!
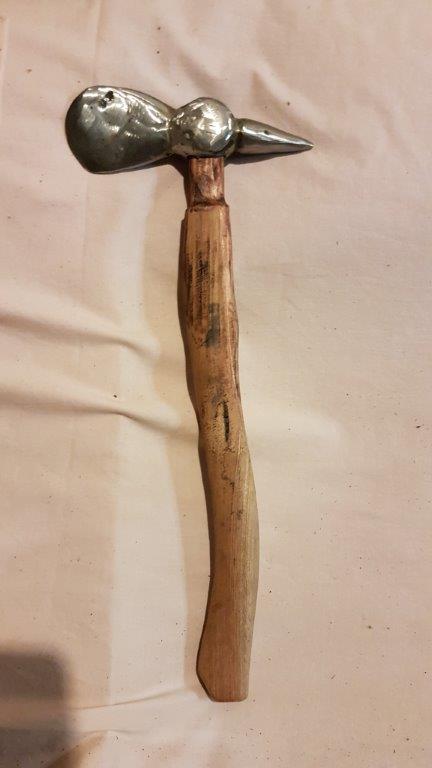
Finally, after getting some help from DJ and a blowtorch, we got to this


From here I sort of knew my way, hand grinder and sanding discs.


In the meanwhile, found a handle and start working on it
Next was to heat treat and again I got some help from my friends (with cutting torch)

Quenching: Warming up the peace of metal evenly until a bright orange color is achieved. Cool down quickly by dipping into old oil. (Never dip into water !)
After that, the metal is baked in a normal oven at 210 grade Celsius for 1 Hour. This is repeated 3 times, allowing the metal to cool down naturally in between. This process is called tempering and is very important to take the stresses out of the metal that was enforced during quenching.
After that, I lightly sanded and then oiled.

Then time to fit the handle. In the handle I did an inlay with a tiger-eye stone.
Very chuffed how my tomahawk turned out !


Also added a neck-guard.

The forging bug had bitten and next I grabbed a big old horse-hoof file. This was heated and beaten with a hammer. The aim was a big chopping kind of knife.


Enough forging, time to use the angle grinder with sanding disk.


Adding a handle after all the heat treatments are finished.
Also gave it meat cleaver status with a hole in the front of the blade.


Made a sheath from an old conveyor belt

David did this with me and this is how his blade turned out. Definitely a beaut of a fantasy blade.

While busy with all the forging, I took my old green Lasher ax, heat treat it again and add a new "pimped" handle.

The best part is the leather sheath I made for it and also adding a neck-guard.


LUMBERMAN ! lol

With forging or rather, with a lack of a good forge while forging, you wait long periods for the metal to heat up. To keep busy, I took out an old love . . . . the blowpipe. Practicing at 10 meter.


One thing let to another . . . . knife throwing.
Also a bucket list activity that I'm trying to master now.
Like everything in life, all it takes is practice . . . practice and more practice.


The "creative" itch was not over yet so I decided to make a bush-craft / utility style knife. Took a big old horse-hoof file again, this time only did stock removal.

Drilled holes in the handle to get the weight down.
Size comparison with a Joseph Rogers pocket knife.

Quenched !


Fitted G10 (Black & Brown) handle scales and also put on a patina stain with white vinegar.


I could just not get used to the look, so I changed it.


Sheath ? Nailed it !! . . . . by mistake

Four more files in the fire. . . . . what for ?

Large throwing knife

My board for throwing at, was a little light for this heavy knife, so I build a throwing board from YouTube with 2x4's.


The heavy knife was just throwing so much better that we needed to make 2 more.

A plain simple sheath was also contracted for the throwing knives.

It took him a long time, but David finally finished his awesome dagger !


